Learn Synthesizer
Acoustic Appropriation
How to make synths sound as infinitely interesting as acoustic instruments.
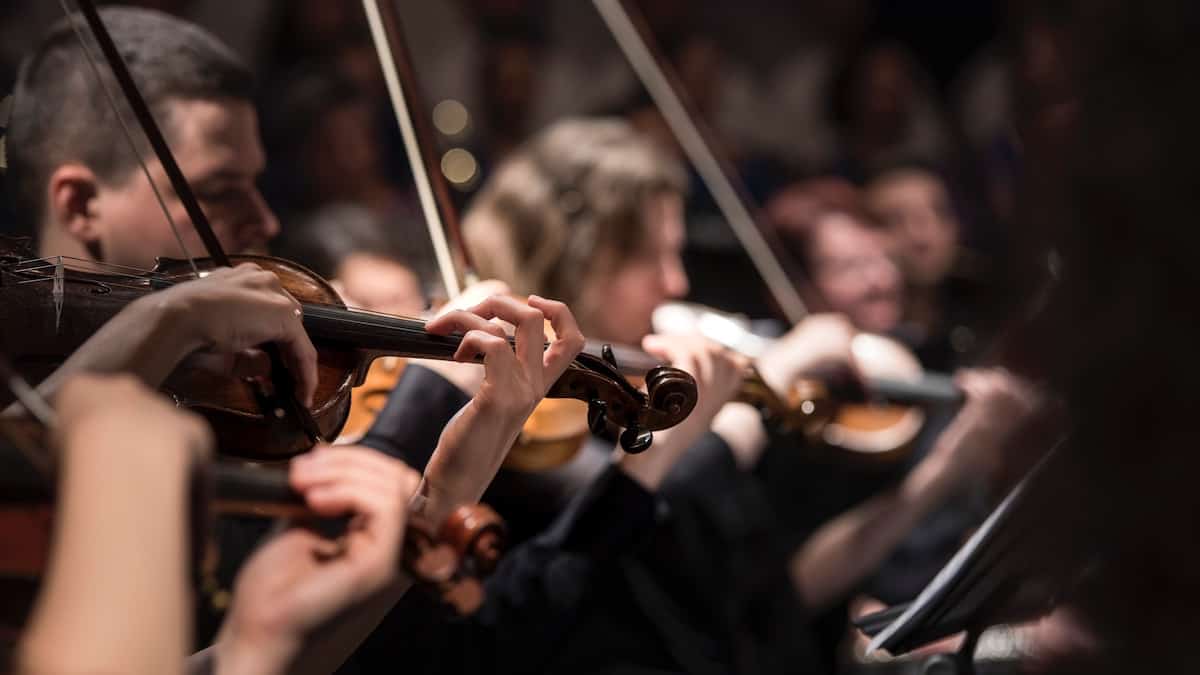
Why do acoustic instruments sound so expressive and interesting, even without accompaniment? When you play a synthesizer with the same tempo, phrasing, and dynamics as Yo-Yo Ma playing one of J.S. Bach’s Cello Suites, why is a sawtooth wave so much less expressive than a real cello? The greatest difference is how acoustic sounds vary from note to note.
All acoustic instruments are essentially machines, each with a finite set of physical variables that a player can manipulate. Individual instruments and instrument types have audible artifacts and idiosyncrasies. For example, at the start of each phrase, you may hear a small burst of breath during a wind instrument’s attack. You may notice the rosin on the bow when someone plays a stringed instrument or the spitty attack when someone plays a brass instrument.
Small deviations in tuning can occur on a note-by-note basis, as well. Such deviations happen any time a mechanical system is forced into motion from a stopped state. Plucked strings go briefly sharp before settling down to the correct pitch, for example. Under certain circumstances, you may also hear mechanical noises, like the thonkof a Fender Rhodes bottoming out when a note is played very hard.
Imparting note-to-note variations to synthesized sounds is an excellent way to make them more interesting. It also offers huge opportunities for greater expressiveness, even if you aren’t trying to imitate acoustic instruments. Such variations can produce sounds that are distinctly synthesized yet more alive than the “standard” synth sounds we all know so well.
Note-to-note variations can range from subtle to dramatic. Such extremes are more easily explored and often more useful with synthesized sounds than with acoustic sounds. With a synth, for example, you could create a variation so delicate that it sits at the edge of perception, or make a baseball bat out of it that you apply the user’s head—a highly exaggerated difference. Most often, you’ll choosea variation that falls between those extremes.
Let’s look at several techniques for adding note-to-note variation to the sounds you play on synthesizers. Once you get a feel for applying these techniques, you’ll find yourself routinely discovering new tricks to put the same concepts into practice.
Where the Magic Happens
When you examine how the timbre of acoustic instruments varies with each note, a few notable attributes crop up repeatedly. Let’s look at three of the most significant.
The most prominent attribute is usually dynamics. Simply put, loud notes don’t sound like soft notes, even when the pitch is identical. The exact ways they differ depend on the instrument, but brightness is the most common tonal variable. On a synth, you usually alter brightness either by filtering or by making sounds louder or softer. Velocity (how hard a note is played) is the easiest way to control dynamics, so it is frequently used to control brightness.
Velocity alone is useful as a modulation source, but it can be even morepotent when you use it with other modulators.Using velocity to scale an amplitude envelope could have a great effect than using it to control VCA level directly, for example, because it more closely mimics the way our ears perceive dynamic variations in acoustic instruments.
Another important consideration is that on an acoustic instrument, it’s practically impossible to play a note so that it sounds exactly the same as the previous note. Maybe you place your finger at a slightly different angle on a guitar string, or you press a saxophone key a little faster on one note than you did on the next.
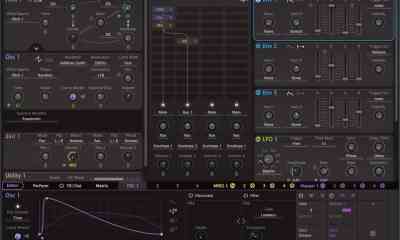
On a synthesizer, you can invoke the same kind of variation using modulation. Sometimes a simple LFO is all you need, but you often need more complex modulation to keep one note from sounding just like the next. You may want to apply randomness or complex LFO waveforms, or you may combine multiple modulation sources that might include a low-rate LFO. Although introducing tiny amounts of random modulation can be quite effective, some synthesizers make it particularly challenging. When modulation amount controls are linear rather than exponential, it can be difficult to get fine resolution near the bottom of the control’s range. With careful planning, you can still do it…sometimes.
Mechanical artifacts can contribute significantly to note-to-note variation. As you ascend up the range of a clarinet or saxophone, the spectral balance of notes changes, getting thinner and squawkier as you move through different regions. Oboes may have very different tones from one pitch to the next, even if it’s only a semitone higher. Sometimes artifacts are particular to an individual performance, such as “dead” notes on a bass guitar or notes with more fret noise than others. This level of variation can be more complex to re-create on a synth, but changing modulation and filter parameters are often good ways to achieve such changes.
In general, applying such techniques sparingly produces more lifelike variations, and that’s my approach. There’s a time and place to get crazy and produce sounds even more extreme than what acoustic instruments can achieve. When dealing with more subtle variations, frequent A/B comparisons help to keep your ear calibrated to the line between interesting variation and distracting warpage.
Variations in Pitch
Some instruments exhibit intonation changes when played very loudly. The pitch variation that occurs when you pluck a string very hard is a good example. As I mentioned, it’s also impossible to play the same note twice in exactly the same manner. Those two phenomena make pitch variation a good technique for producing per-note variation. In all but the most unusual situations, pitch variation should be applied very, very sparingly, with extremely low intensity. Otherwise, tonality could become severely disrupted.
One way to mimic the way intonation changes with volume on some instruments is by using velocity to modulate oscillator pitch. On a synth, however, the degree of pitch change is constant over the note’s duration, which is not how acoustic instruments generally behave. Consequently, on notes of short duration, velocity alone can work in some situations, but velocity by itself is too simplistic to sound good on sustained notes.
Modulating oscillator pitch with a continuous random signal (very low-frequency noise) just creates wobbly pitch. If it’s weird wobble you want, then go for it, but you can get a more usable result with a sample-and-hold approach, using a random signal as the input and Note On messages as triggers. In synthesizers that are capable, you could route noise to a sample-and-hold function triggered by the keyboard, and then modulate oscillator pitch with the output.
Some synthesizers provide easier means to accomplish this effect. Native Instruments Massive, for example, has a Trigger Random macro control. You could apply sampled randomness in different amounts to multiple oscillators for even more variation, but again, low modulation amounts usually produce more usable results. If the synthesizer has modulation scaling, you can use velocity to scale the random value so that louder notes have greater pitch deviation.

Using an envelope to modulate pitch simulates mechanical systems going from a resting state to an active vibration state. Plucked strings, for example, push the pitch a bit sharp on the initial attack, and then ease down to a more-or-less steady pitch as the string settles. In a synthesized sound, you can invert the envelope or give it a negative modulation amount, so that the pitch goes a bit flat and then comes up to pitch, and still get the same basic interest of detuning on note attacks. Different attack and release times can sound like different mechanical systems. While a synthesized plucked string could have a fast attack and slow release, you could produce a bowed string effect by giving the pitch modulation envelope a slightly longer attack.

Good old vibrato is still an effective tool for expression. For greater realism, add velocity scaling to the vibrato depth and maybe to the vibrato rate.
Mechanical Artifacts
Because acoustic instruments are mechanical devices, their musical tones are accompanied by all manner of peripheral noises that may include breath, key or valve clacking, rosin scrapes, fret buzzes, and so forth. These noises add interest to an instrument’s overall sound. This phenomenon may be useful when you’re synthesizing sounds, regardless of whether you’re trying to do anything that resembles reality. A simple method of adding peripheral noise is to assign one or more extra layers to the basic sound.
Let’s say you wanted to do a more or less imitative breath effect. Begin by creating a new sound with noise routed through a resonant filter, and assign an envelope to control its amplitude. Apply velocity scaling to the envelope and velocity modulation to the filter resonance and/or cutoff frequency. Then, while you’re playing, adjust how much noise is mixed in with the primary sound.
This technique achieves the desired effect, but you could try any number of other tweaks. Apply a similar approach to re-create the clacking you might get from a reed instrument’s keys or a brass instrument’s valves.
Some mechanical noises can only be heard on loud sounds or sounds with an intensely abrupt attack. To reproduce that kind of effect, create the ancillary sound and then set the bottom of its velocity range quite high, perhaps to 110 out of 128 or 85 out of 100. That way, the ancillary sound is only audible on the loudest notes.
Another good dynamic effect (though not really emulative of anything mechanical) is to route velocity-scaled, audio-rate modulation to oscillator pitch or filter cutoff frequency, making louder notes increasingly grungy. If you tune the modulation oscillator to a simple integer ratio with the audio oscillator or oscillators, you can get harmonics and sidebands on loud notes.
Range-based Sound Changes
The tones of many instruments vary significantly in different registers of their pitch ranges. The main control here, naturally, will come from key position or note number.
Positional crossfading is one easy way to get different sounds in different registers. As you play up and down the keyboard, one sound fades out at the end of its range as the sound assigned to the adjacent range fades in. While you can use very different sounds in adjacent registers, the most convincing approach is to use waveforms that bear some similarity to each other.
Controlling filter cutoff with the keyboard is probably the range-based modulation technique used most often, but you can use it in more interesting ways than just opening a lowpass filter. One technique is to use a bandpass filter in place of a lowpass filter. Be careful about setting the range over which the filter center frequency varies so that the sound never gets too extreme to sound good.
Some synthesizers, including Massive, allow you to run two filters in parallel. One could be a regular lowpass filter, while the other might be something different, such as an

Another idea is to use note number to scale the amount or rate of LFO modulation. With audio-rate LFOs, this gives you increasing grunge as you go up the keyboard.
Control the Amplitude Envelope with Velocity
Well, of

Try using velocity to modulate the envelope so that the attack time gets shorter as notes get louder, while also making the release time longer.Controlling envelope rates with velocity can also be useful for sounds being layered on top to get the mechanical artifacts effect I mentioned earlier. In addition, simultaneously routing modulation from velocity and from an envelope is an alternative to scaling the envelope with velocity, and it sounds different.
Individual Note Changes
One interesting technique that can be complex to implement on many synthesizers is having individual notes trigger different sounds. This technique is common on synths that play samples of acoustic instruments. An electric bass might have a dead note, or a saxophone might have a note that’s just a bit brassier than the rest or one that squeaks more readily. Unless you’re using a sampler, it’s rarely practical or even possible to design a different sound for each note on the keyboard, so choosing a small number of notes in the instrument’s range and doctoring those should be more readily achievable.
If your synth gives you multiple layers or the ability to set up zones on the keyboard the way a sampler does, create several ranges containing a single note each, use a different waveform or sound for each of those notes, and assign them to separate layers or zones.

For a less repetitious effect that nonetheless makes some notes sound different from the rest, use a step sequencer triggered by the keyboard to add a modulation effect that places noticeable emphasis on certain notes. Let’s say you have a 16-note step sequencer. Set the sequence to an odd number of steps, say, 11 or 13. (The odd number makes it less obvious you are using a sequence.) Make most steps rests, and set the remaining few to high values. Now route the sequencer’s output to modulate the amplitude of an oscillator running at or near an audio rate, and then route that oscillator to modulate an interesting parameter, which could be filter cutoff or resonance, or maybe the pitch, amplitude, or phase of a main audio oscillator. The idea is to not be too subtle, so make sure the steps set to high values result in notes that sound markedly different than the rest. Be careful about using velocity scaling, because at lower velocities, the target notes might not sound different enough.
Appropriate Appropriation
When you’re playing a synth, it’s easy to make any note sound essentially like any other note. The ear likes variation, however, and acoustic instruments satisfy that preference in ways both subtle and obvious. Adapting techniques that give acoustic instruments note-to-note variation in timbre, envelope, and dynamics can give more life to synthesized sounds. These techniques could be especially valuable when several or all the instrumental parts in a song are played on synthesizers.
Sometimes you achieve good results by closely approximating the kinds of change that happen in acoustic instruments; other times it works better to adapt similar concepts. You’ll also encounter a few instances in which taking a variation technique over the top produces interesting results. Combining multiple techniques yields the greatest sophistication in note-to-note variations.
It takes time to adjust your ear to hearing subtle variations, but those subtle variations may prove to be the most useful. I’ve cited a handful of ideas in this article to get you going, but once you have the perspective in your ear, listen closely when you hear acoustic instruments, and many more ideas will reveal themselves to you.


Arturia’s New MiniLab 37 MIDI Controller

Novation’s Launchkey 61 MK4 White Keyboard Controller With Five Octaves

When In Rome…

Introducing Absurdly Quiet Piano Pro

Solid State Logic Introduces the SSL 1 Audio Interface

u-he Zebra3 – the Synth and Software Review

Arturia Memory V Memorymoog Software Emulation Is Here

Realitone Introduces Sunset Choir Lite

Novation Announces Release of the Successor to its Popular FLkey Range of MIDI Keyboard Controllers

Synth Repairs: Long Waits, High Prices
-

 In This Issue4 weeks ago
u-he Zebra3 – the Synth and Software Review
-
In This Issue2 weeks ago
Arturia Memory V Memorymoog Software Emulation Is Here
-
Softsynths3 weeks ago
Realitone Introduces Sunset Choir Lite
-
Synthesizer News3 weeks ago
Novation Announces Release of the Successor to its Popular FLkey Range of MIDI Keyboard Controllers