Features
Teaching Electronic Musical Instrument Design
Want to design a radical new instrument and then bring it to life?
How do you teach electronic instrument design? According to me (and I’ve been doing it for almost 20 years), it takes a combination of mechanical engineering, fabrication, computer programming, synthesizer programming, and electronics. I don’t teach at a big tech school, and not a single student comes into the course expert in all those areas. In fact, most are familiar with only one or two. But when they come out of my one-semester course, they have had enough experience to be comfortable in all of them.
In the fall of 2000, after I had been on the faculty of Tufts University in Massachusetts for only a few months teaching a course in electronic music production, Mechanical Engineering professor Chris Rogers gave me the assignment to create a course in designing electronic musical instruments. Chris had received a grant from piano maker Steinway to build a program in musical instrument design. He had created a class in the design and manufacture of acoustic instruments, in which students got to build things like flutes, zithers, and carbon-fiber ukuleles. Money was still left in the grant, and Chris thought it would be cool to expand into the electronics area. And he thought I was the guy to make it happen.
Accepting the Challenge
I had played many instruments, acoustic and electronic. And I knew something about theremins, MIDI wind controllers, electronic drums, and various attempts at making MIDI guitars. I had been involved in the development of a lot of audio hardware and music software. But designing instruments from scratch? And teaching college students how to do that? I had barely a clue.
So, I read up on historical electronic instruments, alternative MIDI controllers, and how to use electronic sensors. With the help of colleagues in the mechanical engineering department I found out what woodworking, metalworking, and other tools were available to the students. And slowly an image of how to design such a course came into focus.
A friend of mine likes to say in the first year a new course owns you; in the second it’s a draw; and in the third, you own it. The first year I had three students, and the course did not go well. Fortunately, the school gave me the time and space to develop the course, and today I have 12 or so. I could easily have more, but our lab space is limited, so every year I have to turn students away.
Gearing Up
One of my first jobs was to figure out what hardware and software would be appropriate to teach the class. We started with sensors and data-processing hardware from a company called I-Cube. It was very expensive and not particularly reliable. Our first computer was an early iMac. Our first synthesis engine was a Kurzweil K2000, followed soon thereafter by a Japanese software synth called Koblo. And for linking the input data with the synth we had version 3 of Max, the amazing graphical programming language for MIDI.

We soon replaced the processors with a pair of modules from Doepfer. The Pocket Electronic generated MIDI controller commands from 16 analog inputs such as potentiometers. The CTM 64 had 64 switch inputs for generating note commands. We bought these modules without cases and installed them on a piece of plexiglass with a set of terminal strips to make the inputs easier to access. Now we had the freedom to use any sensors we wanted, and the students and I got to know electronics suppliers like Digi-Key and Mouser. I didn’t want to spend time teaching synthesis, so we adopted Reason (2.0 when we started) as our sound engine. Though we eventually dropped the Doepfer equipment, we are still using Max and Reason.
The course is listed in both the music and mechanical engineering departments, and it attracts students from all over the undergraduate spectrum. The requirements are that they have some musical experience, whether it’s in a symphony orchestra or an a cappella group, and that they know something about one or more of the following: sound synthesis and MIDI; electrical engineering and circuit design; computer programming; and fabrication in wood, plastic, and other materials using hand, power, and computer-aided tools.
The Curriculum
In the very first class, I asked the students to think about physical gestures and parts of the body as they pertain to existing instruments. For example, the elbow is an important factor in playing the trombone and the bagpipes, and players use their feet on a drum set and organ. The mouth is crucial to all wind and brass instruments, and every instrument (except perhaps the kazoo) uses the hands and fingers. Then I asked them to envision what kind of musical effect a physical gesture might have if you weren’t restricted to the world of acoustic instruments. What if turning your head made a sound move in space, or snapping your fingers made a chime ring? What if closing your eyes played an arpeggio, or putting your heels together started a beat?

Then followed a survey of electronic sensors. The range of inexpensive sensors available today is huge. Beyond switches, rotary pots, and sliders, there are sensors that use infrared light to measure distance, force-sensing resistors to respond to pressure, resistive ribbons and circular SoftPots, photocells, microphones, piezos, flex sensors, light sensors that read separate RGB color values, multi-axis accelerometers, magnetic switches, capacitive proximity sensors, and many more. I demonstrated how all these sensors work and how a computer can read data from them.
Enter MIDI
At the same time, they’re learning the basics of MIDI and also Reason. They start with the simpler Subtractor and NN19 modules and then expand into mixers, reverbs, equalizers, compressors, and more elaborate modules like Thor and Mälstrom. Then they learn how to make sounds that respond in musically interesting ways to velocity, aftertouch, pitch bend, and multiple continuous controllers. They also learn about envelopes, filters, LFOs, mixers, and processors, and how to control them all in real time.
We start out with small MIDI keyboards with programmable knobs from Samson and M-Audio to generate notes and controllers. We then move to Akai MPDs to get the students to think beyond the keyboard when it comes to triggering and modifying sounds.
Then we dive into the MIDI side of Max/MSP and how to use the program to manipulate incoming MIDI data and send it to Reason. At first they create simple patches like tranposers, arpeggiators, and random note generators. Then they take on more complex tasks like translating velocity to LFO speed, recording and playing back sequences, and list processing. Occasionally an adventurous student will also explore the MSP side of the software and use it to produce complex sounds that Reason can’t handle, such as playing samples backwards.
And Beyond
Next, they tie everything together with an Arduino MEGA, which replaced the Doepfer modules several years ago. The Arduino is an inexpensive microcomputer on a circuit board the size of a deck of cards, with numerous digital and analog inputs and outputs. It communicates over USB. On the Google drive all of our lab workstations share is a Max patch that reads all of the Arduino’s inputs and outputs them as integers. This patch forms the core of the Max patches the students end up building. A few students with more software experience program the Arduino directly to make it do tricks like flash the lights.
While all this is going on, students learn about electronic instruments of the distant and recent past. These include the Ondes Martenot, Yamaha and Akai wind controllers, electronic drum sets and pads, and the clever but short-lived Airdrums. And they get live lectures from inventors and players of current-day instruments. Lecturers have included Mario DeCiutiis, manufacturer of the KAT line of electronic percussion; Vessela Stoyanova, performer on the Buchla Marimba Lumina; Carolina Eyck, theremin virtuosa; Leon Gruenbaum, inventor of a unique computer-keyboard-based instrument called the Samchillian; Moldover, the “godfather of controllerism;” and legendary instrument maker Roger Linn, who Skypes every semester from his home in California.
The Projects
About halfway through the semester, after they have all these technologies in hand, I divide the students into teams of three or four. I am careful to make sure that all the necessary skills to complete a project are present in each team. A cellist who knows Reason teams with an electrical engineer who knows how to wire sensors and a mechanical engineer who knows how to use a CNC router. But by this time, all of the students know something of the others’ fields; they’ve all learned how to solder, program in Max/MSP, and make objects with a 3-D printer.
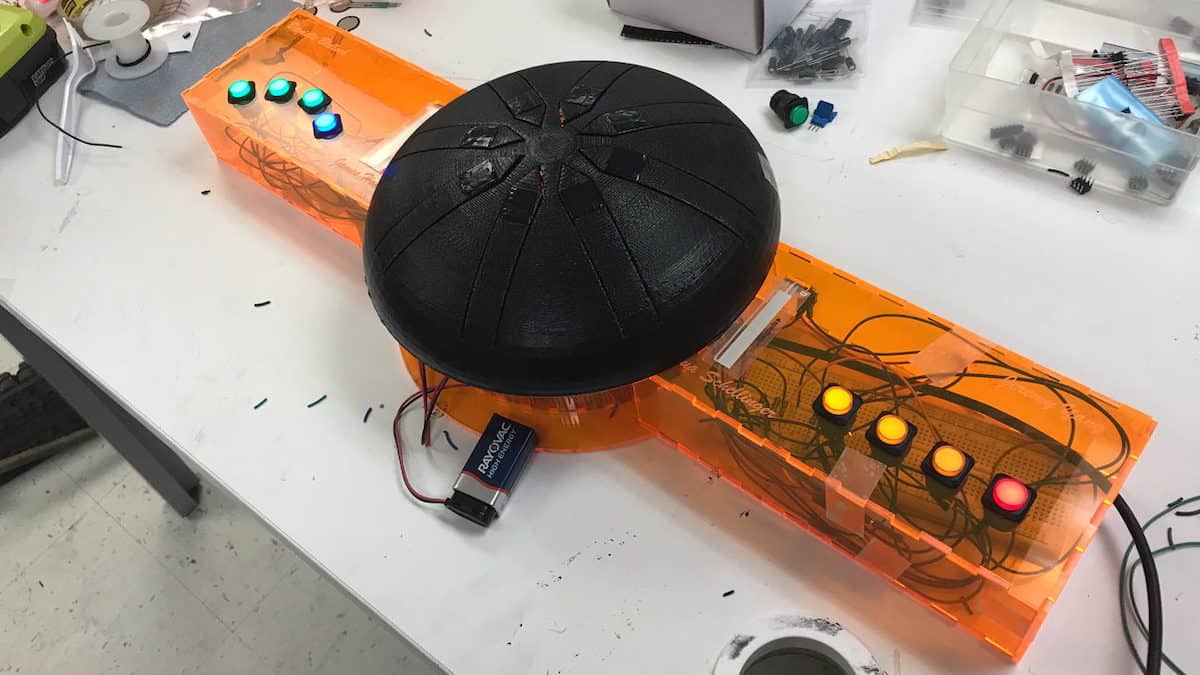
Once the teams are formed, they are tasked with designing their first project. They need to draw their instrument’s physical design, describe how it’s going to be played, and discuss what it’s going to sound like. They produce a parts list, define each member’s task on the project, and come up with a timeline. Over the years the range of projects has been phenomenal. We’ve had stringless harps and basses, musical yo-yos and bicycles, 3-dimensional theremins, percussive shoes, electronic glass harps, and many, many more. For complete descriptions as well as videos of the instruments going back some 15 years, visit tuftsemid.com.
Scholastic Achievement
The teams have about three weeks to finish their projects. During that time they’re learning to solve all sorts of problems. They’ll find the range of a distance sensor isn’t exactly linear and have to modify their Max patch to compensate. They’ll discover, the hard way, that if you touch both sides of a circular SoftPot, you’ll burn your fingers. If you don’t configure your conditional statements in Max in the right place on the screen, they may trigger in the wrong order. And if you don’t initialize your MIDI settings in Max, nothing’s going to come out.
There’s lots of trial and error, and the students learn, in the best way possible, a basic engineering principle: failure can be just as educational, or even more so, as success. And they are constantly challenging themselves and updating their goals. “How playable is this? What can we do to make it more responsive, more dramatic, more fun?”
At the end of the three weeks, they do a formal presentation, performing on the instrument and explaining each aspect of its design. Then we confer about whether they’d like to continue working on it or come up with a new idea. This is also the time when I can evaluate, with students’ input, whether the teams are working well and shuffle some students around if they’re not. Then they have about four weeks to finish what they started or to do their new project. At the end of that we do a public presentation of all the projects. The presentation is recorded on video and eventually—after I do some heavy editing—posted to the course website.
When All Is Said and Done
The students love the course. They love the teamwork aspects, the fact that they’re using some of the latest manufacturing and sensing technology, and the coolness factor that comes from building something unique that makes music. I love the course, too. Watching the students brainstorm over their designs (while I gently nudge them away from unrealistic goals) is exciting and highly satisfying.
But the best part is watching them teach each other. When a violinist can solder a diode without burning her fingers, when a mechanical engineer can dig into Thor and come out with a gorgeous unearthly sound, when a museum school student can find the bug in a Max patch that’s causing the wrong sound to play, and when an economics major can tell a 3-D printer to make a doodad that holds five force-sensing resistors in perfect finger position—that’s when I know it’s been a good semester.


Arturia Rev OCEAN – a Big, Evolving Reverb Ambience Processor

Cherry Audio Releases an Ensoniq ESQ-1 Synth in Software (updated with 2026 features)
Gforce Software Releases Official Prophet 5 Plug-in with Sequential

Arturia’s New MiniLab 37 MIDI Controller

Novation’s Launchkey 61 MK4 White Keyboard Controller With Five Octaves
Arturia’s New MiniLab 37 MIDI Controller

When In Rome…

Introducing Absurdly Quiet Piano Pro

New From AAS – Organix for Chromaphone


