Effects
Review: United Plugins/JMG Audio Hyperspace
Some reverb processors go far beyond the basics of room simulation. Electronic Musician’s former editor-in-chief investigates one you may not know about.
What separates an excellent reverb plug-in from an average one? Naturally, the sound quality, especially when it comes to reverb tails, is critical. Also important is programmability—not necessarily the number of available parameters, but the utility of them. Lastly, does the plug-in’s feature set help facilitate your creativity?
Hyperspace meets all of those criteria. It’s a new algorithmic reverb developed by JMGSound, one of the component companies in United Plugins, a new European consortium that brings together several smaller developers under one roof.
Jump to Hyperspace
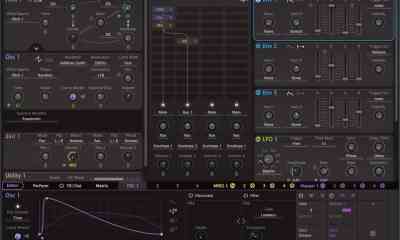
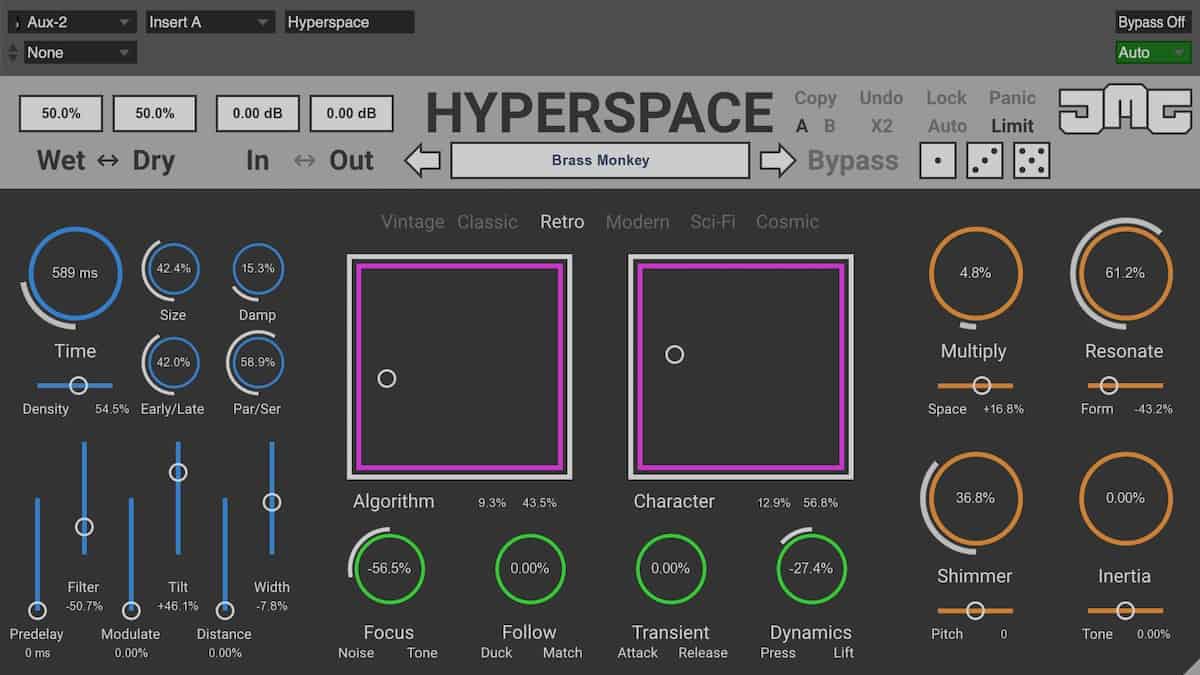
Hyperspace’s GUI features four main color-coordinated sections, plus an upper toolbar area. The Blue Section on the far left is where you’ll find the most familiar reverb parameters, such as Time (RT60), Size, Density, Early/Late (the ratio of early to late reflections) and Pre-delay.
The Damp knob controls how reflective the walls of the virtual space are. Then there’s the Par/Ser (parallel/serial) control. The manual describes it as changing “between parallel and serial routing of the early and late reflections.” Adjusting it alters the resonance characteristics of the sound.

You also get two controls for the frequency response of the reverb. Filter lets you dial in a high-pass or low-pass filter (but not both) and Tilt controls how bright or dark the reverb tail is. For shaping the frequency of the reverb, something I do a lot of when mixing, I would have preferred more conventional EQ controls.
The Blue Section also offers a Distance slider, which changes the virtual distance between the sound source and listener (mainly by changing the tonal content), essentially making the reverberated sound move forward and backward in the soundscape, which is quite effective. The Width control lets you widen or narrow the stereo field.
Green Lights
The Green Section has some handy controls, many of which are related to dynamics processing. Focus changes the balance between tonal and noise elements of the reverb. Turning it fully to Noise can create some unusual results, depending on the source.
Follow lets you dial in the equivalent of ducking compression, which lets the dry signal poke through more, adding to its clarity. On its other extreme, Match, it evens out the dry and reverberated signal levels.

Transient is like a transient shaper for your reverb. You can emphasize or de-emphasize the transients in the reverberated signal, which can impact the sound pretty significantly.
Orange is the New Spacey
The Orange Section is where you can start getting really creative. Each of its controls has a main knob and a parameter slider underneath it.
The Multiply knob creates delayed copies of the early reflections, making the reverberated signal sound a lot busier. Its slider, called Space, controls the delay time of the copies, which you can alter with the XY pads.

Resonate offers metallic sounding resonance created by comb filters. Its slider is called Form, and the manual describes it as “Modifying the distribution of the delays, which sounds like it changes the shape of the resonating object.” In my experimentation with it, it seemed like the Form knob let you alter the resonant frequency, making it possible to tune it in, to some degree.
The Shimmer knob dials in a pitch shift to Hyperspace’s feedback network and has a Pitch slider under it. The slider moves in semitones plus two decimal places so that you can adjust it by hundredths of a semitone, if you wanted to. Depending on how you’ve set the other parameters, you can hear the shift distinctly above the source note.
The last knob in the Orange Section is called Inertia. It’s a freeze function that creates a ringing, sustain effect on whatever’s going through the reverb. You can adjust its frequency content with the Tone slider.
Mixing and Matching
While many of the control features are unusual and compelling, perhaps the most original aspect of Hyperspace is how it lets you manipulate its algorithms with its two XY pads. To get the most from this feature, it’s useful to know how Hyperspace organizes its algorithms and their various attributes.
At the highest level, you can choose between six algorithms: Vintage, Classic, Retro, Modern, Sci-Fi, and Cosmic. Each Algorithm one has what’s called a Structure, which consists of the routing for all the processors in the Algorithm. The manual defines Structures like this: “Structures are often very complex and can have hundreds of processors running in series and parallel with feedback networks. These processors often include delays, all-pass filters, comb filters, vibratos, saturation, filters, and more.”

Below Structures in the hierarchy are the Values. Values are the processors’ settings, such as delay times, filter frequencies, etc.
The two large pink-and-white XY pads are the most powerful feature of Hyperspace. One pad is labeled Algorithm and the other Character. Every time you load one of the Algorithms, its Structure and an alternate one get loaded into the Algorithm pad. The X-Axis of the Algorithm pad crossfades between the primary and secondary Structures.
The Y-Axis uses interpolation to morph between a host of intelligently learned values for the processers in the Structures. The Character pad’s X-Axis changes delay time Values and the Y-Axis “morphs between frequency ranges and internal routings,” according to the manual.
Between the two XY pads, you can make some pretty significant sonic alterations in real-time. Even better, it’s easy to automate these changes, create timed and rhythmic randomization.
Getting Dicey
In addition to the pads, Hyperspace has a depiction of three dice in the upper-right-hand corner of the interface. One has a value of 1, the other 3, and the other 5.
Pressing one of them creates a specific type of change to the patch. The “1” die creates a random setting of the XY pads. The “3” does the same plus changes the Blue parameters with “sensible settings.” The “5” die randomly changes all the parameters and the pads, creating what the developer calls “random chaos.”

The dice are fun and useful, but if you press them when the music is playing, they cause a CPU spike. In Logic Pro X, every time I tried pressing one of the dice the transport stopped, and I got a dialog box saying that I had run out of CPU, even with the buffer on its highest setting.
In Digital Performer, the transport didn’t stop, but I saw a massive CPU spike in the Real Time CPU meter on the upper right. In Cubase, I was able to make changes without interruption. In Pro Tools, pressing a die sometimes stopped the transport and sometimes didn’t.
While it’s most useful (not to mention fun) to “roll” one of the dice when the music is playing, it might be a wiser approach to stop the transport, press one of the dice, and then start it again.
Small Things
Hyperspace comes with a pretty nice collection of patches, with banks for reverb staples like drums and vocals, as well as halls, clubs and other spaces. It also has three Creative banks, Abstract, Metallic, and Supermassive. The presets are well programmed and diverse.
I do have a couple of minor complaints about the way they’re implemented. First, when you click on the Preset box, it opens a separate dialog box called the Preset Browser which lists different categories and specific presets. However, when the Preset Browser is open, you can’t operate any of the controls on the reverb until you close it.

So if you’re trying different presets, you can’t switch to a new one and make a small tweak on it without first closing the Preset Browser Then if you want to change to another preset, you have to open the box again. It just seems unnecessary. I’ve seen plenty of other reverbs with similar preset dialog boxes, but where you can still adjust things on the GUI when they’re open.
While the presets in the Browser are very usable, their wet/dry settings are all configured for use as inserts, rather than aux effects. In my experience, reverb is applied as an aux effect much more often then as an insert. Fortunately, there’s a workaround, which is to set the Wet to 100% and then press the Lock button on the toolbar. Then, when you import other presets, the wet/dry values won’t be changed.
Feeling Hyper
Despite a few minor complaints, I found Hyperspace to be quite impressive, overall. It’s a powerful plug-in that can be both a reverb for general mixing purposes and a creative tool for sound design. Between its unusual parameters and its XY pads, it gives you unique and creative ways to alter its sounds.
You can get a free 7-day trial of Hyperspace, and it’s worth checking out. Hyperspace goes beyond the standard paradigm, offering a refreshing and creative new take on reverb.
Website: unitedplugins.com
Supported platforms:Mac/Win, Mac/Win (VST, VST3, AU, and AAX)
Price:$144


Introducing Absurdly Quiet Piano Pro

Solid State Logic Introduces the SSL 1 Audio Interface

New From AAS – Organix for Chromaphone

The Passing of Jack Hotop, Legendary Sound Designer and Innovator

Arturia Memory V Memorymoog Software Emulation Is Here

u-he Zebra3 – the Synth and Software Review

KV331 Audio Releases SynthMaster 3 Player iOS

Melbourne Instruments brings Braids engine to desktop NINA analog polysynth

New For Behringer UB-1 Micro: 100 Ultimate Patches

New Quadtrack Computer-Based Groovebox
-

 In This Issue3 weeks ago
u-he Zebra3 – the Synth and Software Review
-
 Software News4 weeks ago
KV331 Audio Releases SynthMaster 3 Player iOS
-
 Analog4 weeks ago
Melbourne Instruments brings Braids engine to desktop NINA analog polysynth
-
 In This Issue4 weeks ago
New For Behringer UB-1 Micro: 100 Ultimate Patches