Learn Synthesizer
New Ways to Arpeggiate with Spectrasonics Omnisphere
Omnisphere is one of the most popular soft synths ever, which shouldn’t surprise anyone who’s ever used it.
One of its greatest strengths is its versatility—the result of brilliant programming, the ability to import user samples, and an enormous variety of factory patches created by some of the most talented sound designers in the world. It’s so versatile that you could craft your own timbral universe without sounding like anyone else who uses it.
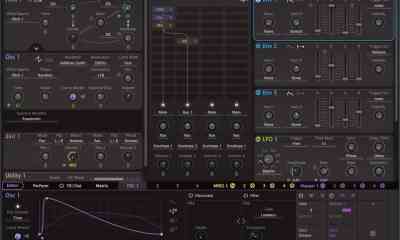
Alongside other enhancements, the latest edition of Omnisphere debuts an updated and expanded arpeggiator with many innovative features previous versions didn’t have. Among these features are new and unique note patterns, step modifiers that divide single notes into multiple notes, and the ability to record the arpeggiator’s output as a MIDI file. Another new feature: each of the eight parts in a multi can have its own arpeggiator, which means eight independent patterns can run simultaneously. Let’s take a look at some of these new capabilities.
An Updated Arpeggiator Panel
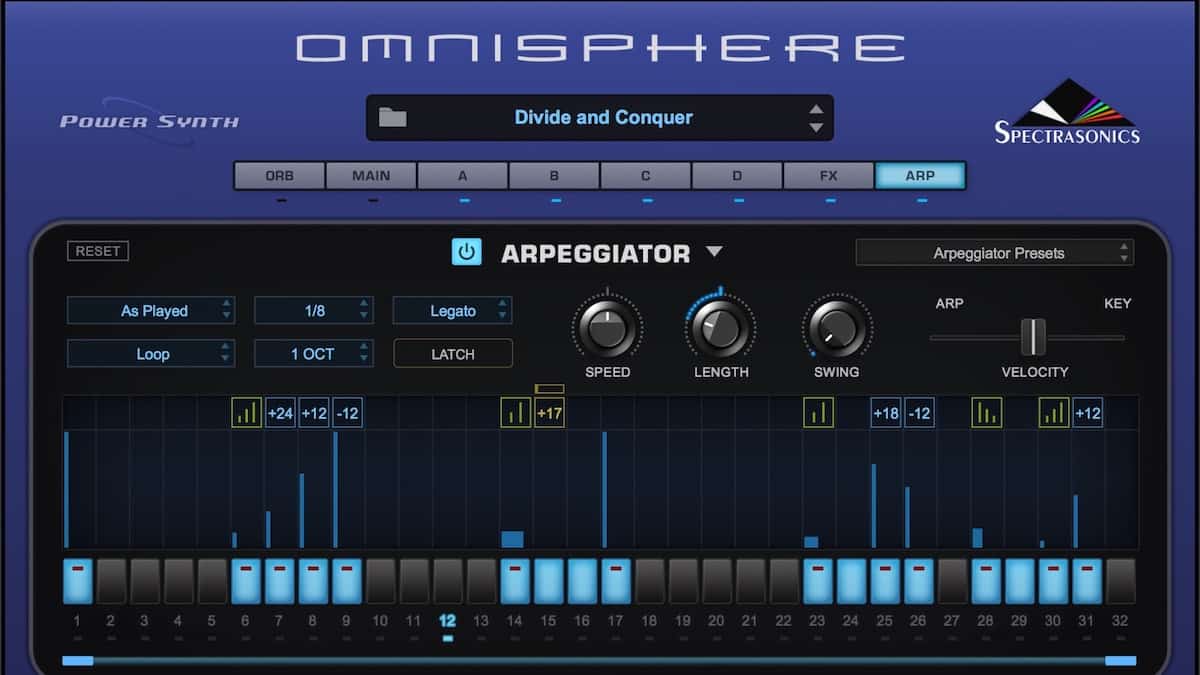
The Arpeggiator panel displays 32 steps, each with a button at the bottom that enables or disables it, a bar whose height determines its velocity and width determines its duration, and a square at the top that turns on its step modifier. The horizontal slider below determines the number of steps in the current arpeggio; dragging its right handle to the left decreases the arpeggio’s length. Clicking on the Arpeggiator’s power button enables or disables its operation.
Arpeggiator Presets
On the panel’s upper-right corner, use the dropdown Arpeggiator Presets menu to choose from dozens of factory-programmed arpeggios, to initialize an empty preset, to save new or edited presets, and to copy and paste presets between locations.

Note Patterns
On the Arpeggiator panel’s upper left, the Note Patterns menu determines the order that notes will play when you trigger an arpeggio. You’ll find all the patterns you’d expect—Up, Down, Up/Down, As Played, and Random—as well as some you probably don’t, such as Join, Spread, Stairs Up/Down, Repeat X4, and Down/Up+. You may find these more unusual patterns most useful when you set their range to cover more than one octave. Try them out for yourself, and consult Omnisphere’s manual when you don’t immediately grasp what’s going on.

Rather than playing an arpeggio, the Chord setting plays block chords on every step in a rhythmic pattern. That makes it ideal for playing rhythmic chord progressions.
Functions
Clicking the triangle just to the right of the Arpeggiator header reveals the Functions menu. Functions are all about improving your workflow and saving time. The Duplicate Range command simply repeats the arpeggio, doubling its length and making copy-and-paste a convenient one-step operation, whereas Duplicate Mirror pastes the repeated instance in reverse order. Because arpeggios are limited to no more than 32 steps, these functions work best with 16 steps or fewer.

The next four commands change the order that steps play, and they don’t affect arpeggio length. Rotate Left moves the first step to the last position and shifts everything else one step sooner, whereas Rotate Right moves the last step to the first position and shifts everything else one step later. Reverse Order creates a mirror image of the arpeggio, and Shuffle creates a random pattern of the existing steps. The Function menu is also where you initialize an arpeggio, resulting in a clean stale, or delete all its step modifiers.
Step Modifiers
Step modifiers give Omnisphere’s arpeggiator a few unique capabilities. Clicking on the square above a step’s velocity slider reveals a popup menu for selecting Transpose, Slide, Chords, Hi-Low, or Step Divider values from submenus.
Step division may be the most interesting and useful of these. During playback, it causes a step to trigger a fixed number of times before moving on to the next step; it may sound rather like a stutter. This effect, often called ratcheting, was popularized in the mid-1970s by the German electronic music ensemble Tangerine Dream, and it’s long been considered a mainstay of classic Berlin School sequencing. Omnisphere not only lets you choose two, three, or four repetitions, but it can also make the repetitions ramp up (Rise) or down (Fall) in velocity.

Transpose lets you choose the interval that a step will be offset from what its pitch would be without a modifier, as much as 24 semitones up or down. Slide is similar, but it produces a glissando from the expected pitch to the transposed pitch. Adjusting the little horizontal slider above the step modifier square lets you control how quickly the pitch slides.
Chord modifiers make it possible to create an arpeggio in which only selected steps play chords while others play single notes. When you hold down a chord, a step with a chord modifier plays more than one note simultaneously. Whereas the Chords setting plays the entire chord, Chord Voicing 1 plays only odd-numbered notes, and Chord Voicing 2 plays only even-numbered notes. Chord Inversions, as you’d expect, plays various inversions of whatever chord you hold, and High-Low plays either the highest or the lowest note in the chord. Unfortunately, you can only apply one modifier to a step, which means you can’t transpose a step at the same time you apply a step divider, for example.
If you’d like to hear some examples of what step modifiers can do, listen to these three audio clips:
Exporting MIDI Files from the Arpeggiator
MIDI Capture allows you to record the arpeggiator’s MIDI output as a Standard MIDI File, which you can then open in any DAW program. Begin by clicking the Capture button in the Arpeggiator panel’s lower-right corner and choosing a length, as many as 16 bars. When you begin playing, Omnisphere will record every note you play, along with the arpeggiator’s effect on the notes you play. When recording is complete, clicking on the icon that looks like a cross made of arrows and dragging it to your computer’s desktop creates a new MIDI File. When you open the MIDI File in your DAW and play it, you should hear exactly the same note pattern you heard when you recorded it.
I hope learning about the new features in Omnisphere’s arpeggiator inspires you to explore the bounds of your own creativity. You can derive a lot of satisfaction simply by opening the browser and investigating a few of the presets in the ARP + BPM category. The only way to master any aspect of Omnisphere, however, is to dig in, create some patches and patterns of your own, and make some music with them.


When In Rome…

Introducing Absurdly Quiet Piano Pro

Solid State Logic Introduces the SSL 1 Audio Interface

New From AAS – Organix for Chromaphone

The Passing of Jack Hotop, Legendary Sound Designer and Innovator

u-he Zebra3 – the Synth and Software Review

New Quadtrack Computer-Based Groovebox

Arturia Memory V Memorymoog Software Emulation Is Here

Realitone Introduces Sunset Choir Lite